Morning Everyone!
This week I used the 'Lost & Found - Record It!' by My Mind's Eye from the March Being Scrappy Kit. Now these papers are very glittery and I am not a big fan of glitter papers as it goes everywhere however do love the look so tend to just do a lot of wiping up afterwards! I used some pics from my brother-in-law and sister-in-law's wedding last year that feature the colour they used.... tiffany blue. Sam proposed to Cheryl in New York and then bought her ring from Tiffany's so was pretty special to them both.
I used the 'Antique Lovely' paper as the base for my layout... no glitter and I loved the chandeliers.
Cut a 5" x 12" strip of the glitter 'Antique Charming' paper. Then cut two 1" x 12" strips of the beige Bazzill and punch a fancy border. Attach to each side of the glitter 'Antique Charming' paper and then stick the whole lot down about 1" from the bottom of the layout.
I added 4 x photos (three 4" x 5.5" and one 4" x 6") to the left side of the layout, though you could use a different combination if that suited your layout better.
Add some of the matching brads and tags to embellish the layout.
Finish off with a title, mine were from my own stash.
Pop on over to Niki's blog Being Scrappy to see her two layouts for this week.
Thanks for looking!
Kirei x
Showing posts with label Being Scrappy. Show all posts
Wednesday, 26 March 2014
Wednesday, 19 March 2014
March Week 3 layout for Being Scrappy...
Morning Everyone!
This week from the Being Scrappy Kit I am using the 'Memories Captured' papers by Fancy Pants for my layout, loving the cameras, stars and stripes! I dug out some photos from our trip to the Olympic Park during the 2012 Olympics that have been in need of scrapping..
I used the yellow side of the 'Chalked Art' paper for the base of my layout.
Cut a 7.5" x11" piece of the 'My Camera' paper and stick down to the right side of the layout.
Then cut a 2" x 12" strip of the 'Shining Star' paper and stick down approx. 1.75" from the bottom.
Next cut a 5" x 10.5" piece of the striped 'Shining Star' paper and stick down approx. 3" up from the bottom.
I punched a 12" zigzag strip from the yellow Bazzill and added to the bottom of the striped paper.
Mount a 4.75" x 6.5" photo (cropped down from 5" x 7") onto the yellow Bazzill. Add to the layout along with a 4" x 4.75" photo.
Add some of the matching stickers and punched stars to embellish the layout.
Add some journaling.
Finish off with a title, I used a couple of alphas from my own stash.
Pop on over to Niki's blog to see the two layouts she has designed for this week.
Thanks for looking!
Kirei x
This week from the Being Scrappy Kit I am using the 'Memories Captured' papers by Fancy Pants for my layout, loving the cameras, stars and stripes! I dug out some photos from our trip to the Olympic Park during the 2012 Olympics that have been in need of scrapping..
I used the yellow side of the 'Chalked Art' paper for the base of my layout.
Cut a 7.5" x11" piece of the 'My Camera' paper and stick down to the right side of the layout.
Then cut a 2" x 12" strip of the 'Shining Star' paper and stick down approx. 1.75" from the bottom.
Next cut a 5" x 10.5" piece of the striped 'Shining Star' paper and stick down approx. 3" up from the bottom.
I punched a 12" zigzag strip from the yellow Bazzill and added to the bottom of the striped paper.
Mount a 4.75" x 6.5" photo (cropped down from 5" x 7") onto the yellow Bazzill. Add to the layout along with a 4" x 4.75" photo.
Add some of the matching stickers and punched stars to embellish the layout.
Add some journaling.
Finish off with a title, I used a couple of alphas from my own stash.
Pop on over to Niki's blog to see the two layouts she has designed for this week.
Thanks for looking!
Kirei x
Wednesday, 12 March 2014
March Week 2 layout for Being Scrappy...
Morning Everyone!
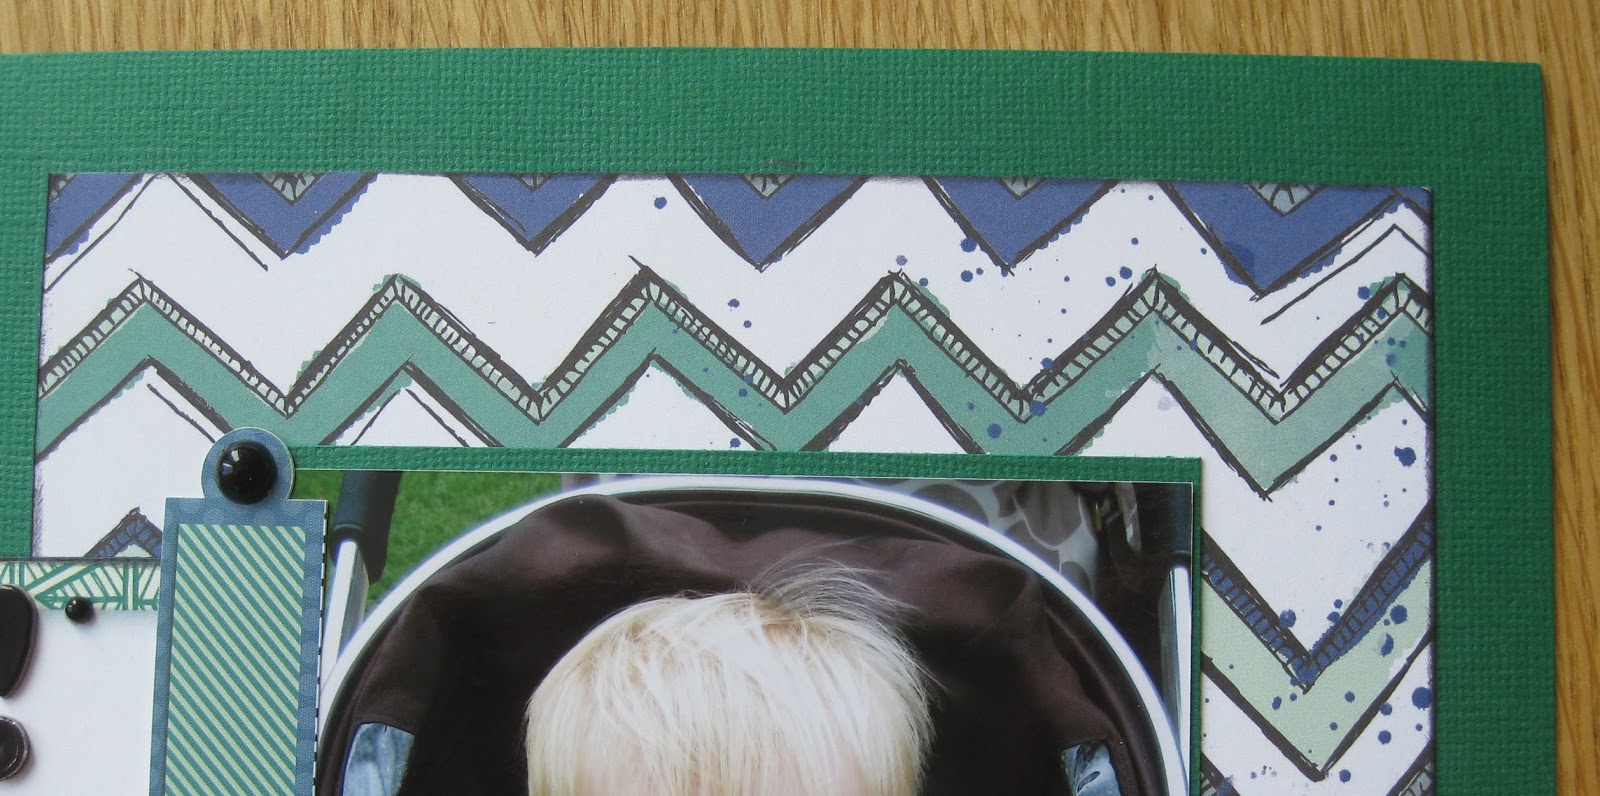
This week I used the sketch style 'Zip-A-Dee Doodle' papers from Bo Bunny for my layout. I had a few photos of our godson Freddie that I have been waiting to scrap so these papers were perfect.
I used the green Bazzill for the base of the layout. I did gut a piece 5.5" x 10" from the right side as I wanted some to mount the larger photo on.
Cut a 6" x 11" piece of the 'Zig Zag' paper, ink the edges and stick down over the hole you have just gutted.
Next cut an 11.75" x 2" strip of the 'Ink' paper and cut a banner in one end. Then ink the edges. Stick down 2.75" from the bottom of the layout.
Mount a 6" x 4" photo onto the green Bazzill. Then trim two other photos down to 3" x 5.5" (you could just use another 6" x 4" photo if that works better for you.
Select a couple of the journaling cards from the 'Zig Zag' paper, ink the edges.
Then stick the photos and journaling cards down after working out what order you want them in.
To embellish the layout I added some of the matching stickers and large and small black gems (both match the paper range). I also used a few of the brads that come with the March Kit (yellow & green) as I wanted to add a pop of colour.
Finish off with a title, I used some from my own stash.
To see what Niki has created this week, pop on over to her blog Being Scrappy.
Thanks for looking!
Kirei x
This week I used the sketch style 'Zip-A-Dee Doodle' papers from Bo Bunny for my layout. I had a few photos of our godson Freddie that I have been waiting to scrap so these papers were perfect.
I used the green Bazzill for the base of the layout. I did gut a piece 5.5" x 10" from the right side as I wanted some to mount the larger photo on.
Cut a 6" x 11" piece of the 'Zig Zag' paper, ink the edges and stick down over the hole you have just gutted.
Next cut an 11.75" x 2" strip of the 'Ink' paper and cut a banner in one end. Then ink the edges. Stick down 2.75" from the bottom of the layout.
Mount a 6" x 4" photo onto the green Bazzill. Then trim two other photos down to 3" x 5.5" (you could just use another 6" x 4" photo if that works better for you.
Select a couple of the journaling cards from the 'Zig Zag' paper, ink the edges.
Then stick the photos and journaling cards down after working out what order you want them in.
To embellish the layout I added some of the matching stickers and large and small black gems (both match the paper range). I also used a few of the brads that come with the March Kit (yellow & green) as I wanted to add a pop of colour.
Finish off with a title, I used some from my own stash.
To see what Niki has created this week, pop on over to her blog Being Scrappy.
Thanks for looking!
Kirei x
Wednesday, 5 March 2014
March Week 1 layout for Being Scrappy...
Morning Everyone!
I have a fab new Being Scrappy Kit to play with and this week I am using the 'Now & Then' papers by My Mind's Eye. They seem quite girly but I had some pics of Lee's godson Oscar that I thought were perfect with these papers.
I used the stripey 'Pretty Charmed' paper as the layout background.
Take three 6" x 4" photos and mount onto a piece of the blue Bazzill.
Die cut a 4.5" fancy circle from the pink striped 'Wild & Free' paper, cut in half and stick just under the top right and bottom left of the mounted photo strip. Stick this down 2.5" from the bottom.
Punch a fancy border in two 0.5" x 6" strips of the blue Bazzill. Cut two 0.5" x 12" strips of the pink striped 'Wild & Free' paper and two 0.5" x 12" strips of the spotty 'Pretty Blossom' paper. Layer these up at the top and bottom edges of the layout as seen in the photo.
Add some of the matching My Mind's Eye stickers to embellish the layout.
I included some journaling in the bottom right of the layout.
Finish off with some a title with the funky pink glitter Thickers alpha that comes with the Kit.
Pop on over to Niki's blog to see the two layouts she has designed this week.
Thanks for looking!
Kirei x
I have a fab new Being Scrappy Kit to play with and this week I am using the 'Now & Then' papers by My Mind's Eye. They seem quite girly but I had some pics of Lee's godson Oscar that I thought were perfect with these papers.
I used the stripey 'Pretty Charmed' paper as the layout background.
Take three 6" x 4" photos and mount onto a piece of the blue Bazzill.
Die cut a 4.5" fancy circle from the pink striped 'Wild & Free' paper, cut in half and stick just under the top right and bottom left of the mounted photo strip. Stick this down 2.5" from the bottom.
Punch a fancy border in two 0.5" x 6" strips of the blue Bazzill. Cut two 0.5" x 12" strips of the pink striped 'Wild & Free' paper and two 0.5" x 12" strips of the spotty 'Pretty Blossom' paper. Layer these up at the top and bottom edges of the layout as seen in the photo.
Add some of the matching My Mind's Eye stickers to embellish the layout.
I included some journaling in the bottom right of the layout.
Finish off with some a title with the funky pink glitter Thickers alpha that comes with the Kit.
Pop on over to Niki's blog to see the two layouts she has designed this week.
Thanks for looking!
Kirei x
Wednesday, 26 February 2014
February Week 4 layout for Being Scrappy...
Morning Everyone!
So, this week I am using the final lot of papers from the Feb Being Scrappy Kit... 'Cupid's Arrow' by My Mind's Eye and as the name would suggest they have a Valentine's slant to them. I chose a pic of my brother-in-law Sam and sister-in-law Cheryl on their wedding day, perfect to go with the fab foiled hearts paper.
I used the foil heart 'Confetti Hearts' paper for the base of my layout.
Next cut a 6" x 10.5" piece of the red 'Love Journal Cards' paper and stick down to the left side.
Then cut a 1.25" x 10.5" strip of the hearts 'Chevron' paper (making sure you get both the blue and red hearts when you cut).
Cut a 1" x 10.5" strip of the aqua Bazzill and punch a decorative edge, stick this just under the left side of the hearts strip and stick down to the far left overlapping the red already stuck down.
Pick one of the journaling cards from the 'Love Journal Cards' paper and stick down to bottom left.
I added a heart doily from my stash.
Mount a 4.5" x 6" photo (cropped down from 5" x 7") onto the aqua Bazzill and stick down.
Punch 6 x hearts from the different papers and stick down in the top right corner, add some striped twine to create a string of bunting.
Finish off with a title using the Thickers alpha that comes with the Feb Kit.
To see the layouts that Niki has come up with this week pop on over to her blog.
Thanks for looking!
Kirei x
So, this week I am using the final lot of papers from the Feb Being Scrappy Kit... 'Cupid's Arrow' by My Mind's Eye and as the name would suggest they have a Valentine's slant to them. I chose a pic of my brother-in-law Sam and sister-in-law Cheryl on their wedding day, perfect to go with the fab foiled hearts paper.
I used the foil heart 'Confetti Hearts' paper for the base of my layout.
Next cut a 6" x 10.5" piece of the red 'Love Journal Cards' paper and stick down to the left side.
Then cut a 1.25" x 10.5" strip of the hearts 'Chevron' paper (making sure you get both the blue and red hearts when you cut).
Cut a 1" x 10.5" strip of the aqua Bazzill and punch a decorative edge, stick this just under the left side of the hearts strip and stick down to the far left overlapping the red already stuck down.
Pick one of the journaling cards from the 'Love Journal Cards' paper and stick down to bottom left.
I added a heart doily from my stash.
Mount a 4.5" x 6" photo (cropped down from 5" x 7") onto the aqua Bazzill and stick down.
Punch 6 x hearts from the different papers and stick down in the top right corner, add some striped twine to create a string of bunting.
Finish off with a title using the Thickers alpha that comes with the Feb Kit.
To see the layouts that Niki has come up with this week pop on over to her blog.
Thanks for looking!
Kirei x
Wednesday, 19 February 2014
February Week 3 layout for Being Scrappy...
Morning Everyone!
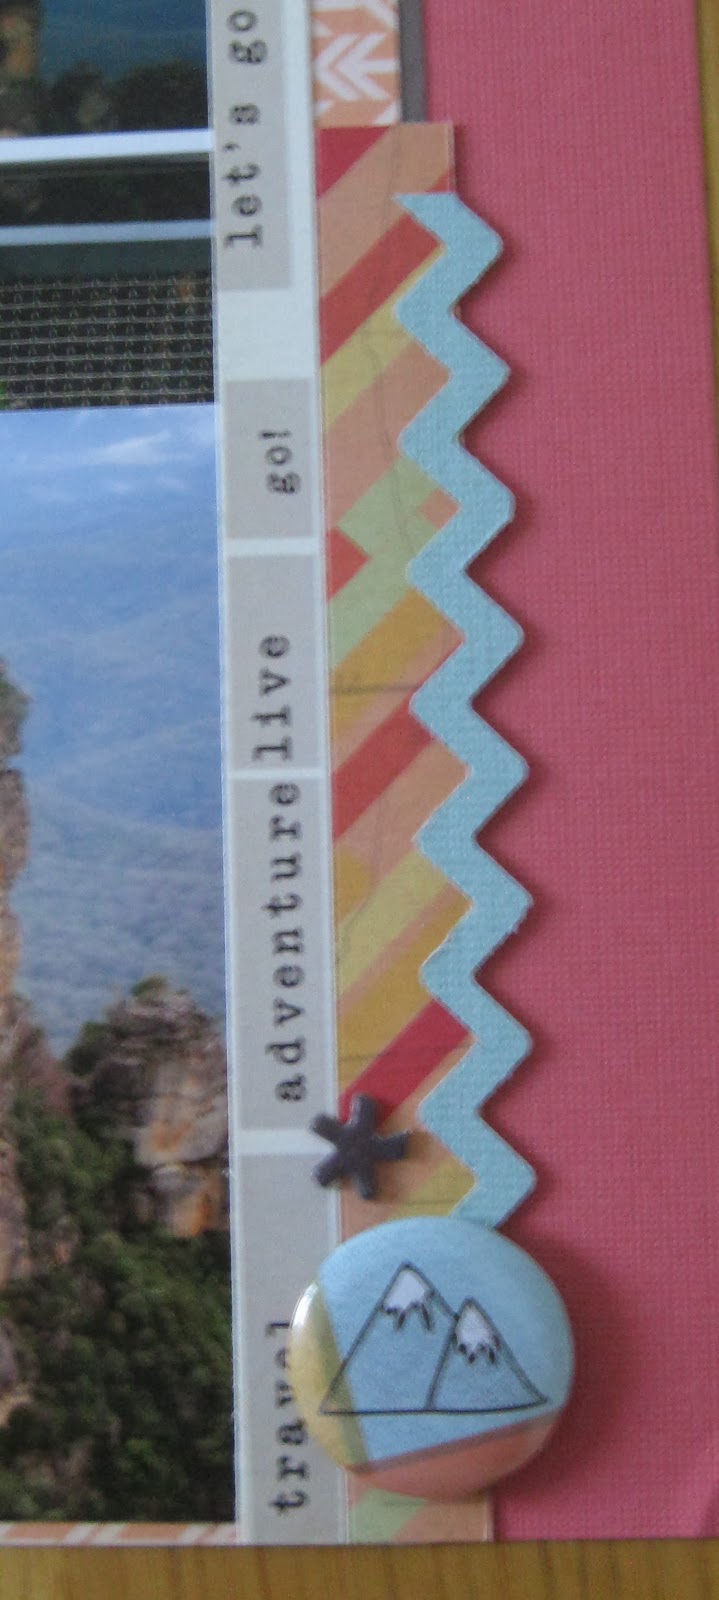
For this weeks Being Scrappy layout I am using the fab 'Thataway' papers by Studio Calico. With that name they are obviously travel themed but could be used for anything... though I did end up using some pics from our last trip to Australia!
I started with the red Bazzill as the base for my layout.
Then cut a 7" x 12" piece of the orange arrows 'Points of Interest' paper. Then cut two 1" x 12" strips of the grey arrows 'Made It' paper and stick these both under the long edge of the 'Points of Interest' paper so a small border is peeping out. Then stick down to the right side of the layout.
Add three 6" x 4" photos, these were trimmed very slightly so that there was a border at the top and bottom of the paper when you stick them down.
Cut two 4.5" x 0.75" strips of the striped 'Made It' paper and stick down to the top left and bottom right. Add a punched zigzag strip of green Bazzill to each striped piece (I happened to have a couple of leftover strips in my stash that I used).
Then cut an 11" strip of the words from the 'Points of Interest' paper and stick down.
Add a title (I used a Thickers alpha from my own stash). I also included some journaling in the bottom left of the layout.
Finish off with a couple of the Flair buttons that come with the Kit. I also added a few asterisks from the Thickers alpha.
Niki has designed two fab layouts this week, pop on over to her blog here to see them.
Thanks for looking!
Kirei x
For this weeks Being Scrappy layout I am using the fab 'Thataway' papers by Studio Calico. With that name they are obviously travel themed but could be used for anything... though I did end up using some pics from our last trip to Australia!
I started with the red Bazzill as the base for my layout.
Then cut a 7" x 12" piece of the orange arrows 'Points of Interest' paper. Then cut two 1" x 12" strips of the grey arrows 'Made It' paper and stick these both under the long edge of the 'Points of Interest' paper so a small border is peeping out. Then stick down to the right side of the layout.
Add three 6" x 4" photos, these were trimmed very slightly so that there was a border at the top and bottom of the paper when you stick them down.
Cut two 4.5" x 0.75" strips of the striped 'Made It' paper and stick down to the top left and bottom right. Add a punched zigzag strip of green Bazzill to each striped piece (I happened to have a couple of leftover strips in my stash that I used).
Then cut an 11" strip of the words from the 'Points of Interest' paper and stick down.
Add a title (I used a Thickers alpha from my own stash). I also included some journaling in the bottom left of the layout.
Finish off with a couple of the Flair buttons that come with the Kit. I also added a few asterisks from the Thickers alpha.
Niki has designed two fab layouts this week, pop on over to her blog here to see them.
Thanks for looking!
Kirei x
Wednesday, 12 February 2014
February Week 2 layout for Being Scrappy....
Morning Everyone!
This week I am using the 'You Are My Happy' papers by Teresa Collins from the February Being Scrappy Kit. I used another of my wedding photos for this layout.
I picked the pretty foil paper 'Hearts' for my background.
Cut a 5" x 8" piece of the kraft Bazzill, ink the edges and stick down to the bottom right of the layout.
Next cut a 5.5" x 6" piece of the floral 'Pretty Flowers' paper and ink the edges. Stick down to the left of the kraft Bazzill.but leave the top edge free as I wanted to pop the big tag in here.
Then cut a 2" x 11" strip of the 'Pretty Flowers' paper and stick down to the bottom of the other papers.
Add your 6" x 4" photo.
Add one of the small tags along with a few punched shapes to the bottom left of the photo.
Then take a small strip of one of the patterned papers along with a few more punched shapes and add to the top right of the layout. I added a few small pearl dots to finish off.
Finish off with a title, I used some alphas from my own stash.
To have a look at what Niki came up with this week, pop on over to her blog here.
Thanks for looking!
Kirei x
This week I am using the 'You Are My Happy' papers by Teresa Collins from the February Being Scrappy Kit. I used another of my wedding photos for this layout.
I picked the pretty foil paper 'Hearts' for my background.
Cut a 5" x 8" piece of the kraft Bazzill, ink the edges and stick down to the bottom right of the layout.
Next cut a 5.5" x 6" piece of the floral 'Pretty Flowers' paper and ink the edges. Stick down to the left of the kraft Bazzill.but leave the top edge free as I wanted to pop the big tag in here.
Then cut a 2" x 11" strip of the 'Pretty Flowers' paper and stick down to the bottom of the other papers.
Add your 6" x 4" photo.
Add one of the small tags along with a few punched shapes to the bottom left of the photo.
Then take a small strip of one of the patterned papers along with a few more punched shapes and add to the top right of the layout. I added a few small pearl dots to finish off.
Finish off with a title, I used some alphas from my own stash.
To have a look at what Niki came up with this week, pop on over to her blog here.
Thanks for looking!
Kirei x
Wednesday, 5 February 2014
February Week 1 layout for Being Scrappy...
Hi Everyone!
We have a fab new Being Scrappy Kit for February... I love checking out the new papers, alpha and embellishments that I have to play with! For this week's layout I am using the pretty 'Flea Market' papers by Crate Paper and some sweet pics of Lucy (our friend's daughter) getting ready to go to a party (apologies for the out of focus photo, I didn't realise it wasn't so good until writing this post!).
I used the words side of the 'Market' paper as the background for my layout as I thought the words were perfect with the photos I had.
Next I cut a 2" x 11" strip of the spotty 'Tag Sale' paper. Cut 'v' shapes out of each end, ink the edges and stick it down approx. 3.5" from the bottom of the layout. Cut a 1" x 9.5" strip of the pink 'Pale China' paper and punch a fancy border in it, ink the edges and stick down just over the bottom edge of the banner strip. Then cut one of the manufacturer's strips to 9", ink the edges and stick down.
Mount a 6" x 4" photo onto a piece of the pink 'Antique' paper and stick down with a slight slant to the right of the layout.
Crop another photo to 3.5" x 3.5" and stick down to the left of the first photo. Add one of the pretty matching fabric frames that come with the Kit.
Cut out one of the tags from the 'Tag Sale' paper, ink the edges and stick down below the bigger photo. Make sure it is one that allows enough room to add your journaling.
I cut out some of the pretty plates from the 'Fine China' paper to embellish the layout. Ink the edges before sticking down.
Finish off with your title, there is a fab alpha that comes with the Kit and I decided to string it onto some twine in the top left corner.
Have a look here to see the two layouts that Niki has designed this week. If you like what you see pop on over here to see the full February Kit and all of the subscription details.
Thanks for looking!
Kirei x
We have a fab new Being Scrappy Kit for February... I love checking out the new papers, alpha and embellishments that I have to play with! For this week's layout I am using the pretty 'Flea Market' papers by Crate Paper and some sweet pics of Lucy (our friend's daughter) getting ready to go to a party (apologies for the out of focus photo, I didn't realise it wasn't so good until writing this post!).
I used the words side of the 'Market' paper as the background for my layout as I thought the words were perfect with the photos I had.
Next I cut a 2" x 11" strip of the spotty 'Tag Sale' paper. Cut 'v' shapes out of each end, ink the edges and stick it down approx. 3.5" from the bottom of the layout. Cut a 1" x 9.5" strip of the pink 'Pale China' paper and punch a fancy border in it, ink the edges and stick down just over the bottom edge of the banner strip. Then cut one of the manufacturer's strips to 9", ink the edges and stick down.
Mount a 6" x 4" photo onto a piece of the pink 'Antique' paper and stick down with a slight slant to the right of the layout.
Crop another photo to 3.5" x 3.5" and stick down to the left of the first photo. Add one of the pretty matching fabric frames that come with the Kit.
Cut out one of the tags from the 'Tag Sale' paper, ink the edges and stick down below the bigger photo. Make sure it is one that allows enough room to add your journaling.
I cut out some of the pretty plates from the 'Fine China' paper to embellish the layout. Ink the edges before sticking down.
Finish off with your title, there is a fab alpha that comes with the Kit and I decided to string it onto some twine in the top left corner.
Have a look here to see the two layouts that Niki has designed this week. If you like what you see pop on over here to see the full February Kit and all of the subscription details.
Thanks for looking!
Kirei x
Wednesday, 29 January 2014
January Week 5 layout for Being Scrappy...
Morning Everyone!
This week I am using the final selection of papers from this month's Being Scrappy Kit, 'Polka Dot Party' from American Crafts. Even though the papers are quite girly I used a photo of Lee and his godson Oscar and I think they work really well!
I used the pink Bazzill as the base for my layout.
Cut two 10" x 1.5" pieces of the butterflies 'Fantastic Favours' and stick down approx. 2" from the top and bottom of the layout. Leave an opening approx. 4.5" wide at the top right so that you can pop a tag in.
Cut out the large journaling card from the 'Fantastic Favours' paper, punch a hole in one end, cut the corners off into a tag shape and attach some twine (from my own stash).
Next cut two 1" x 6" strips of the chevron 'Flourishing Flowers' and stick down on either side of the layout approx. 0.5" in from each edge, and 3.25" from the bottom edge.
Cut a 10.25" x 6" piece of the white 'Dazzling Decor' paper, punch a note paper edge in one of the long edges and stick down.
Next cut 10" x 5.75" piece of the floral 'Flourishing Flowers' paper and layer up over the other papers.
I then added the die cut card that comes with Kit (Favourite) as I wanted to use it as part of the title.
Add one of the patterned border strips.
Mount a 6.5" x 4.5" photo onto a piece of the white 'Dazzling Decor' paper and stick down.
Take the tag that you prepared earlier, add your journaling and then tuck the tag into the opening in the top of the butterfly paper.
Embellish the layout with the matching stickers.
Add a title using the Thickers Alpha that come with the January Kit.
Pop on over to Niki's blog to see the two layouts that she has come up with this week. You can buy the Kit here for a limited time!
Thanks for looking!
Kirei x
This week I am using the final selection of papers from this month's Being Scrappy Kit, 'Polka Dot Party' from American Crafts. Even though the papers are quite girly I used a photo of Lee and his godson Oscar and I think they work really well!
I used the pink Bazzill as the base for my layout.
Cut two 10" x 1.5" pieces of the butterflies 'Fantastic Favours' and stick down approx. 2" from the top and bottom of the layout. Leave an opening approx. 4.5" wide at the top right so that you can pop a tag in.
Cut out the large journaling card from the 'Fantastic Favours' paper, punch a hole in one end, cut the corners off into a tag shape and attach some twine (from my own stash).
Next cut two 1" x 6" strips of the chevron 'Flourishing Flowers' and stick down on either side of the layout approx. 0.5" in from each edge, and 3.25" from the bottom edge.
Cut a 10.25" x 6" piece of the white 'Dazzling Decor' paper, punch a note paper edge in one of the long edges and stick down.
Next cut 10" x 5.75" piece of the floral 'Flourishing Flowers' paper and layer up over the other papers.
I then added the die cut card that comes with Kit (Favourite) as I wanted to use it as part of the title.
Add one of the patterned border strips.
Mount a 6.5" x 4.5" photo onto a piece of the white 'Dazzling Decor' paper and stick down.
Take the tag that you prepared earlier, add your journaling and then tuck the tag into the opening in the top of the butterfly paper.
Embellish the layout with the matching stickers.
Add a title using the Thickers Alpha that come with the January Kit.
Pop on over to Niki's blog to see the two layouts that she has come up with this week. You can buy the Kit here for a limited time!
Thanks for looking!
Kirei x
Subscribe to:
Posts (Atom)