Saturday 29 September 2012

Simply Stampin' Challenge #79 - Sketch

Hi Everyone!

There were some fab creative entries for last week's 'Stitch It' Challenge, have a look here to see our favourites...

This week we are back to a Sketch Challenge, and it's something a little different...


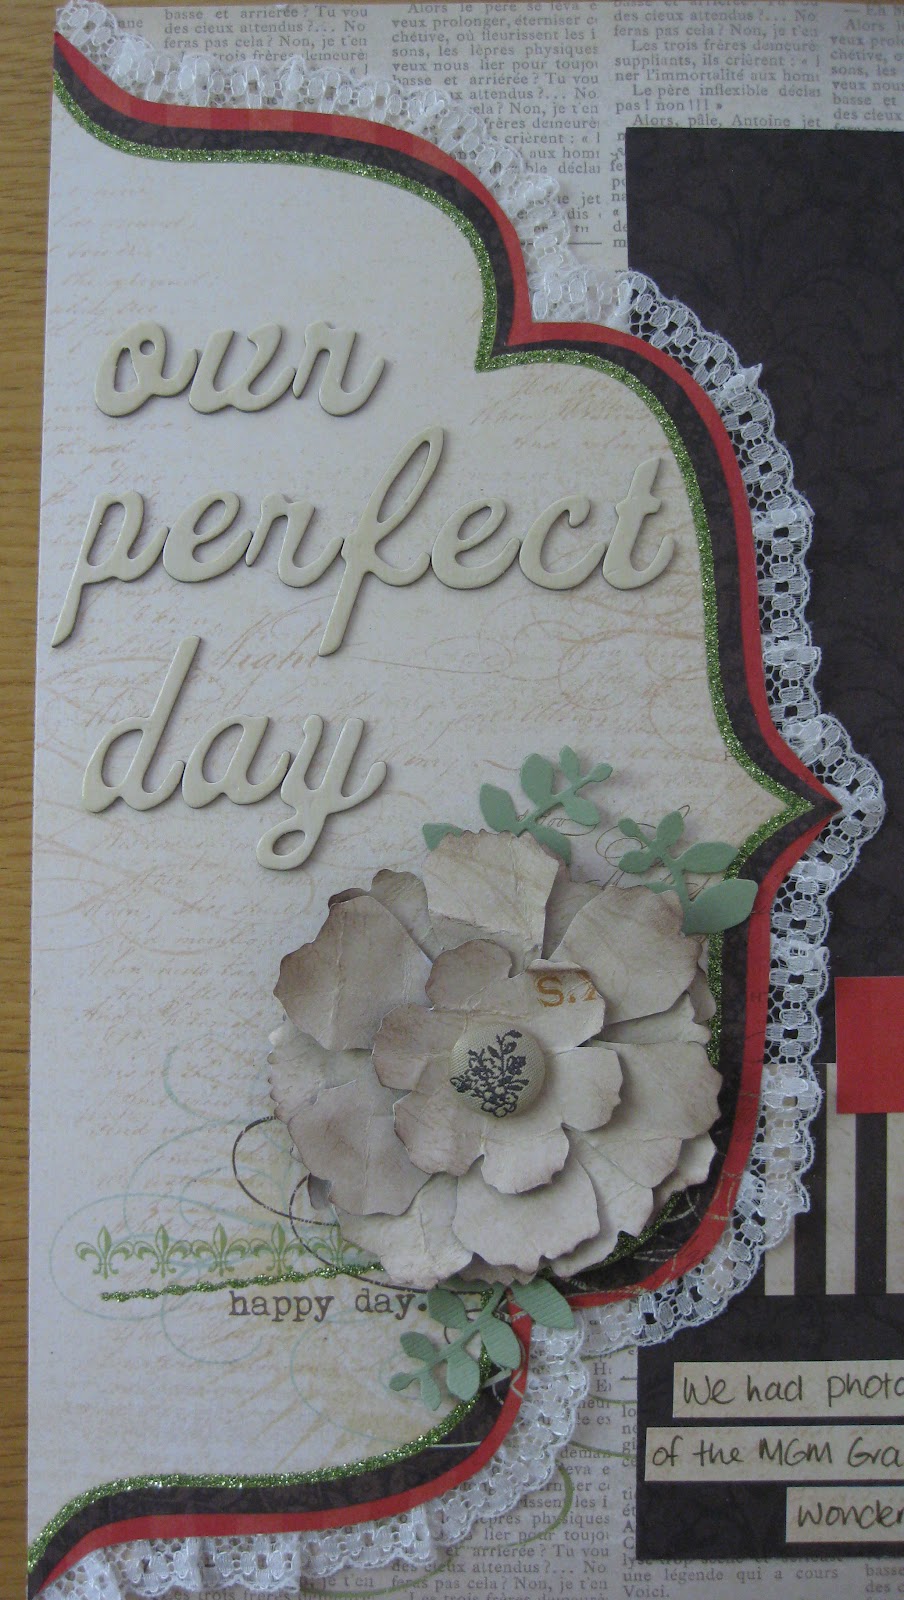
And this is what I came up with...


A close up of the detail.... lots of punching from patterned paper and cardstock. I stamped on the cardstock and then added some embellishments.


Products used (all by Stampin' Up! unless specified):
Cardstock: Cherry Cobbler, Old Olive, Crumb Cake, Whisper White
Paper: Regals & Brights Designer Paper Stack
Ink: Cherry Cobbler, Old Olive, Crumb Cake
Accessories: Scallop Circle Punch, 1 3/8" & 1 1/4" Circle Punches, 1/8" Old Olive Taffeta Ribbon, Brights & Neutrals Designer Buttons, Antique Brads, Linen Thread, Rhinestone Jewels
Stamp Set: French Foliage, Delightful Decorations, Pennant Parade, Tiny Tags

So why don't you give this week's 'Sketch' Challenge a go, and don't worry if you don't have a blog as we do accept email entries!

Thanks for looking!
Kirei x

Wednesday 26 September 2012

Sept Week 4 layout for Being Scrappy...

Hi Everyone!

This week we had more of the vintagey, glittery 'Lost & Found Two' papers from My Mind's Eye to play with and I knew exactly what I wanted to scrap, a pic from my wedding day as the papers were perfect for that!


I decided to use the 'Dotted' paper as the base for my layout (no gutting this week!). Then I cut the 'Everything' framed paper in half and carefully cut around the edge of the frame leaving a narrow border of red.

I then cut a selection of shapes from the patterned papers which will be layered up underneath my photo: brown patterned - 5" x 10.25", brown striped 1.25" x 7.25", red striped 0.75" x 6", cream with glitter edge 2.5" x 7". These can be stuck down as shown in my main layout pic. Attach your photo mounted to a piece of the green Bazzill. Cut out the 'Celebrate' word frame and attach to the top right of the layout.


Now take the fancy framed paper and stick some double sided tape to the back all around the curved edge then attach the lace ribbon ruffling it as you go. Stick this down to the main layout.

 
I made a large flower cut from the Tim Holtz Tattered Floral die (3 x large and 1 x small) and attached the layers together with a brad from my stash. Stick to the layout covering the typewrier image (as this didn't work for my photo) and then punch some leaves and attach under the flower. 
 
 
Finish off with some strips of journaling for under the photo (from the 'Celebrate' paper) and add a title (from my stash).  


Do go and see what Niki did with the Kit this week... and for a fab monthly subscription offer have a look here.
 
Thanks for looking!
Kirei x
 

Saturday 22 September 2012

Simply Stampin' Challenge #78 - Theme

Hi Everyone!

Apologies that I have been missing in action for the past few weeks... I am back now and on track again! We had lots of lovely entries for last week's Colour Challenge and you can see who we voted our favourites here...

This week we are back with a Theme Challenge and we want you to...

'Stitch It' (faux or sew)!

This is what I came up....
 
 
And a close up of my faux stitching!
 
 
Products used (all by Stampin' Up! unless specified):
Cardstock: Cherry Cobbler, Always Artichoke, Whisper White
Paper: Regals Designer Paper Stack
Ink: Cherry Cobbler
Markers: Cherry Cobbler, Always Artichoke
Accessories: Cherry Cobbler Seam Binding, Rhinestone Jewels
Stamp Set: Season of Joy

So why don't you give this week's 'Stitch It' Challenge a go, and don't worry if you don't have a blog as we do accept email entries!

Thanks for looking!
Kirei x


Wednesday 19 September 2012

Sept Week 3 layout for Being Scrappy...

Hi Everyone!

Well, I managed to get back on track this week and get my post done in time!

I had the pretty 'Indie Chic'papers from My Mind's Eye to work with this week, though it did take me a while to choose the photos and then come up with the layout. I knew I wanted to use the 'Primrose' paper as the base but I just couldn't get the photos right, so I stopped playing around with it and came back to it a week later and it all just came together... sometimes you just need to take a break from trying too hard!


I used the pink Bazzill as base for the main paper and gutted it first leaving a 1.5" frame. Then I cut the 'Primrose' paper down to an 11" square, distressed the edges and attached it to the pink Bazzill frame. I mounted my two photos onto the pink Bazzill and then onto one of the patterned papers. I used the grey 'Chevron' paper for my large photo and the pink 'Geometrics' paper for the smaller one. My photos were 6.5" x 5" and 4" x 3.5". Before attaching to the base I stuck a small strip of the orange 'Geometric' paper to the left underside of the larger photo. Then I attached both photos to the layout.

Layer up some strips of the patterned papers and the ribbons at the bottom of the larger photo.


Finish off the embellishments by adding the pretty flowers that come with the Kit to the bottom left and top right of the larger photo. I tucked some little loops of the lilac ric-rac in around the flowers.


My journalling was written on some narrow strips of the cream grid 'Primrose' paper and attached to the bottom right of the photo.


 I finished it off with a title using some alphas from my own stash.


Have a look here to see what Niki did with the Kit...

If you like this Kit, why not have a look at the monthly subscription offer at Be Scrappy where you can save money!

Thanks for looking!
Kirei x

Friday 14 September 2012

Sept Week 2 layout for Being Scrappy...


Hi Everyone!

Apologies as I am extremely late posting this week's layout for the Be Scrappy Kit. We were away last weekend and I then had a few late nights with work and have just not caught up at all! Anyway better late than never so here is what I did with this week's Kit which contained the nice and bright 'Shoreline' papers from American Crafts.


I used the sun side of the 'Solana' paper as my base, and cut carefully around the 'sun' image in the bottom right corner as I wanted to pop this up on some foam pads. I also gutted a 6" square from the centre of this paper. I cut a 9" square from the 'Newport' paper (wave side), but don't stick it down yet! I then used what was left of that paper to cut enough pieces to layer under the wave paper, if you look closely enough you will see where the joins are (one each side).


Attach these and then use the blue selvedge to edge the red 'Newport' paper, again be careful as I had to cut it into 3 x pieces to fit! Now you can attach the 9" square of the 'Newport' paper to your base, and then stick down the three photos. Mount one of these on the blue Bazzill. My photos are 6" x 4", 5.5" x 4" and 4.5" x 4".

Now reattach the 'sun' image on foam pads. Add some journalling using some strips of the gutted piece from the 'Solana' paper.


Finally add a title using the bright and glittery Thickers that come with the Kit. I did add a few alpha stickers from my stash!


Have a look here to see the layouts that Niki made with the Kit...

Thanks for looking!
Kirei x

Wednesday 5 September 2012

Sept Week 1 layout for Being Scrappy...

Morning Everyone!

I'm back with another layout using this week's fab Kit from Being Scrappy! The papers in the Kit were from the range 'Note to Self' by Echo Park, and I knew the perfect pic to go with these - it had to be one of our godsons! This is a cute photo of Freddie with his mum Kirsty which was taken when we were visiting them last year and took a day trip to Bradford on Avon.


I used the brown patterned side of the 'Inventory' paper as my base, now I did gut it leaving a 2" frame however didn't end up using it, it just means I have more scraps leftover to play with later!

Cut a 9" square from the 'Stripes' paper, ink the edges then stick down centrally to the main paper.

Next cut a 7.5" square from the 'Journalling Cards' paper, ink the edges and stick down to the right side of the striped paper. Be careful when you cut this as I did use a journalling card from this paper so you may want to work out what journalling card you want to use before cuttting out the square.

Then add your photo, mine is a 7" x 5" that I cut down to 6.5" x 4.75".

Now add your embellishments, mine were a selection of stickers from the Echo Park sticker sheet that we received in the Kit and one of the journalling cards that was cut from the 'Journalling Card' paper.


Finish off with a title using the alpha stickers that also came with the Kit.


Have a look here to see what Niki did with the Kit...

Thanks for looking!
Kirei x


Saturday 1 September 2012

Simply Stampin' Challenge #75 - Theme

Morning Everyone!

I hope you all enjoyed last week's Colour Challenge, thanks to everyone for their fab entries! Now this week we are back with the Theme Challenge and it is...
 
'Baby, Baby, Baby'
 
Now I only realised when coming to do this one that I didn't really have too many baby type stamp options to use... so I dug out  the 'Something Sweet' stamp set that I had not used for some time and came up with this...


Products used (all by Stampin' Up! unless specified):
Cardstock: Pink Pirouette, Whisper White
Paper: Subtles Designer Paper Stack
Ink: Pink Pirouette, Pretty in Pink
Accessories: Circle Treat Cups, 1 3/4" Circle Punch, Subtles Brads, Pretty in Pink 1/8" Taffeta Ribbon (retired), cottonwool
Stamp Set: Something Sweet

So why don't you give this week's Theme Challenge a go, and don't worry if you don't have a blog as we do accept email entries!
 
Thanks for looking!
Kirei x